How To Fit Kitchen Plinth Onto Plastic Adjustable Legs
Fitting a kitchen plinth can be one of those tasks that seem complicated but, in actuality, can be tackled quite effectively with some patience and the right tools.
Not only does a well-fitted plinth elevate the aesthetic of your kitchen, but it also conceals any unsightly elements such as adjustable legs and cables.
This guide aims to walk you through the entire process, from measuring your base units to actually fitting the plinths. Let's dive in!
Tools Needed to Fit A Kitchen Plinth
- Tape Measure
- Pencil
- Carpenters Square
- Mitre Saw or another sharp cutting tool
- Jigsaw or Scribing tool (if needed for uneven floors)
- Plinth clips (usually supplied with the plastic legs)
- Connector blocks or Wood Blocks (for corner installations)
- Small tool or rod for plinth removal
- Plinth Sealing strips (optional)
Attaching Plinths to The Plastic Legs
Step 1
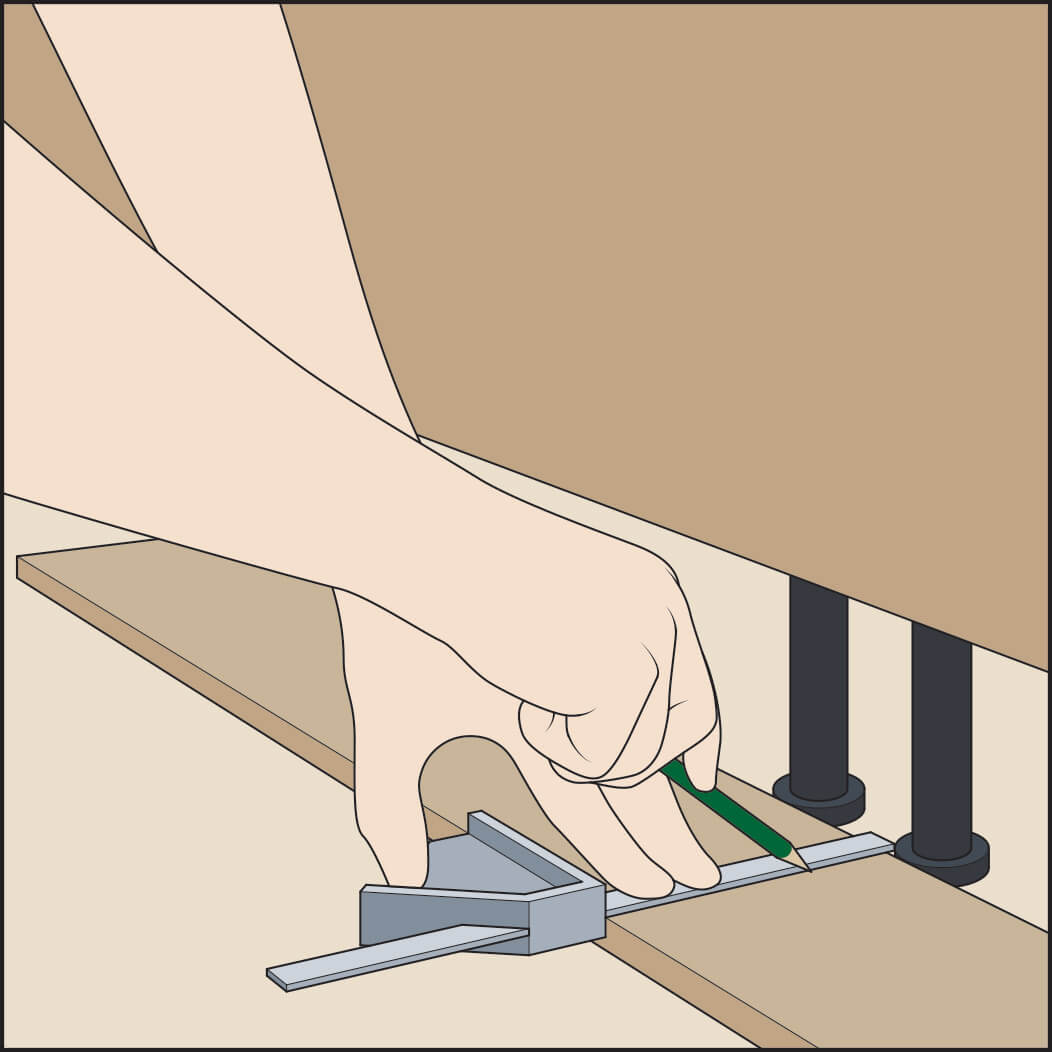
Start by placing your cut plinth in front of the plastic adjustable legs. Ensure the back is facing upwards. Using a square, strike a pencil line in the centre of each leg.
Step 2

Multiple Legs: Continue this marking process for each leg where the plinth will attach.
Step 3
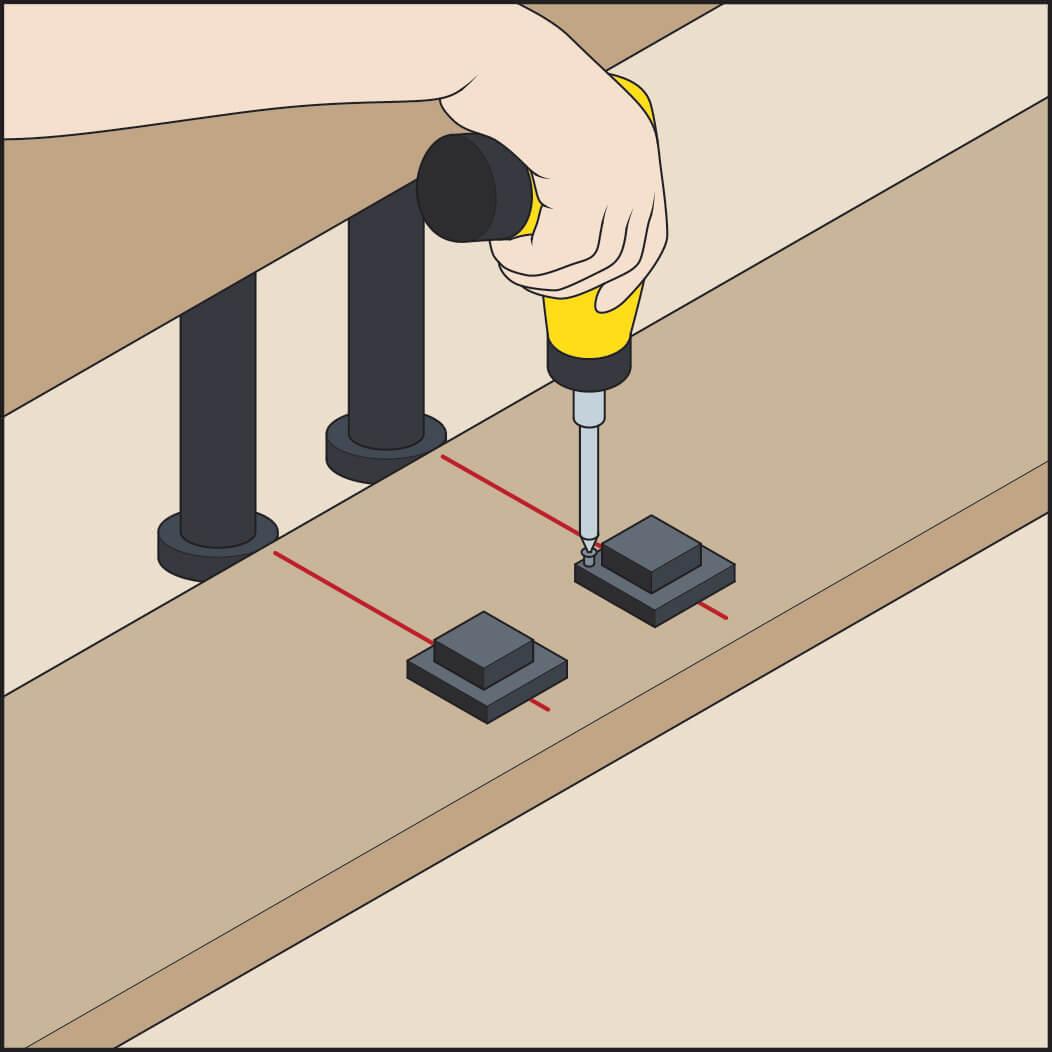
Attach the plinth clip plates approximately 50mm from the top, aligned with the pencil marks. These plates should allow the horse-shoe section of the clip to slide from left to right.
Step 4

Slide the horse-shoe section of the clips into the plates. They should be able to slide left to right for easier positioning.
Step 5
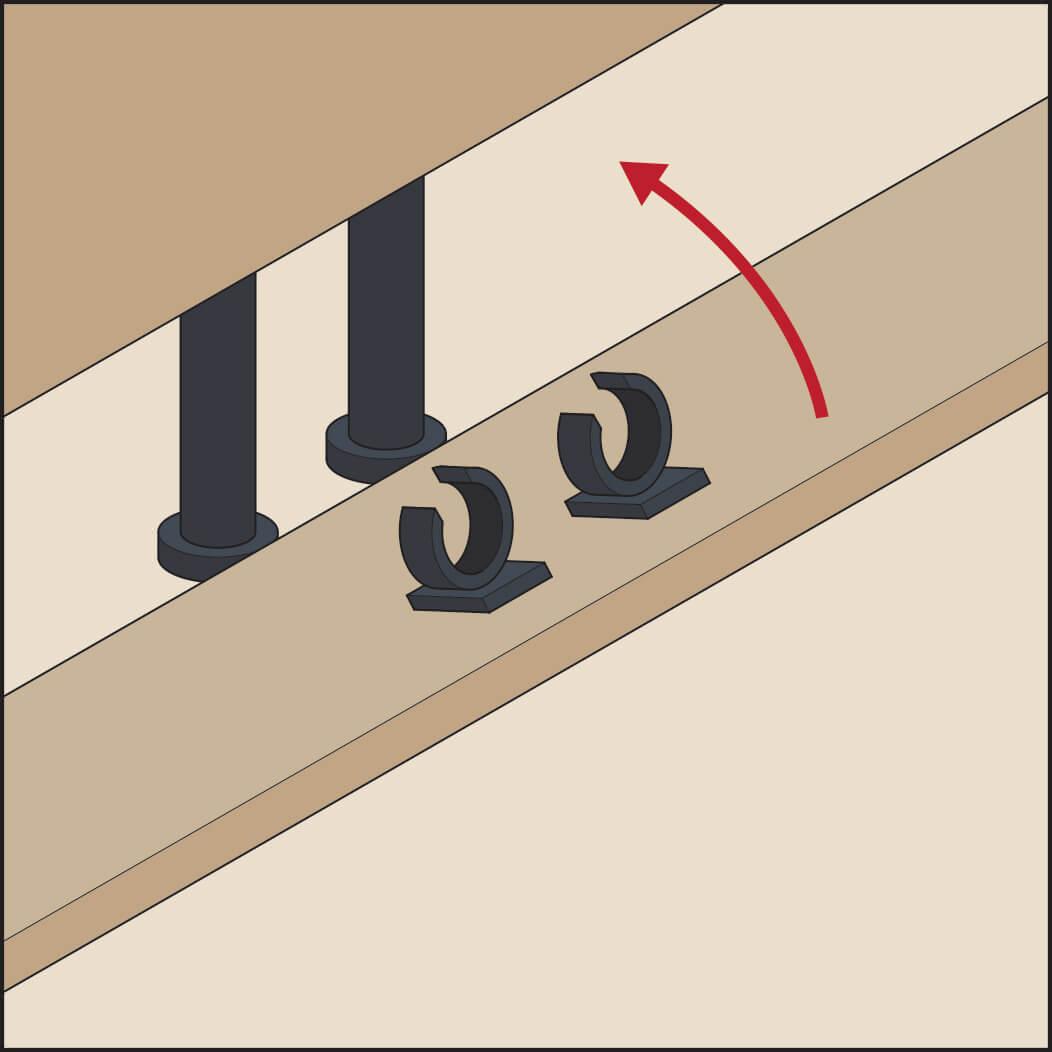
Finally, lift the plinth into position, starting from the bottom edge, and clip it onto the plastic leg using the horse-shoe clip.
Initial Measurements and Plinth Selection
- Measurement: Start by measuring the kitchen base units to find out how much plinth you'll need. If you have corner or return units, don't forget to measure these as well.
- Consider Plinth Lengths: Plinths usually come in lengths between 2.6 to 3 metres. Make sure to account for this when making your measurements, particularly if you wish to avoid joints.
- Oversized Cutting: Once you have the measurements, cut the plinths to an oversized length. This will ensure that you don’t incorrectly use it elsewhere in the installation.
Types of Plinth Installations
The installation of your kitchen plinth will generally fall under one of four categories:
- Straight Run: This is the simplest form of plinth installation. Measure the exact length of the gap to be filled, and then cut the plinth accordingly.
- L-Shape: For an L-Shape, one of the two plinth sections should be approximately 50mm longer than the actual length required. This enables the plinth to continue under the units in the corner. The second piece is cut and installed in a similar way to a Straight Run section.
- U-Shape: This is similar to the L-Shape but requires two straight runs to complete the installation.
- Return Plinth: These are used when End panels are not installed and the plastic legs are visible. A Return Plinth can be joined by either a 45-degree mitre cut or a butt joint. Always remember to seal or apply edging material to the cut edge.
Pro Tip: A mitre saw will help you achieve precise cuts, particularly for angled installations like L-Shape or Return Plinths.
Preparing the Plinths
- Floor Level: If the floor is uneven, you may need to scribe the bottom of the plinth to the floor for a better fit.
- Edge Sealing: Cut edges should be sealed or re-edged to eliminate the possibility of water ingress. Plastic plinth sealing strips can be an additional measure to prolong the plinth's life and provide a neat finish.
FAQs: Your Questions Answered
Embarking on a DIY kitchen plinth installation can naturally come with questions and challenges. Our FAQ section aims to address some of the most common queries you may have.
Whether you're curious about tools, techniques, or troubleshooting, you'll find helpful answers below to ensure your project runs as smoothly as possible.
Do I need to use all the clips?
No, as long as the plinth feels firm, it's okay to miss some out.
How do I remove the plinth?
Use a small tool or rod above the plinth to pull on the back and release it from the clips.
Can I fit a kitchen plinth if my floor is uneven?
Yes, In such cases, scribing may be necessary to ensure a good fit.
Can I cut the plinth with a handsaw instead of a mitre saw?
Yes, you can use a handsaw, but a mitre saw will provide more accurate and cleaner cuts. If you're using a handsaw, make sure it's sharp and take extra care to keep your cuts straight.
What material should I use to seal the cut edges of the plinth?
You can use a sealing strip or edge banding that matches your plinth material. Alternatively, you can use silicone sealant for water resistance.
Is it possible to install the plinth without removing the base units?
While it's more convenient to install the plinth with the base units removed, you can still do it without removing them. Just ensure that you have enough room to manoeuvre and attach the clips properly.
What should I do if my plinth doesn’t fit snugly after cutting?
If there are minor discrepancies in fit, you can use sandpaper to smooth out any imperfections. If the gap is significant, however, you might need to cut a new piece of plinth.
Can I paint or stain my plinth after installation?
Absolutely! Make sure to remove the plinth first and follow the painting or staining guidelines appropriate for the material of your plinth.
What types of connector blocks should I use for joining plinth sections?
You can use standard plinth connectors which usually come with pre-drilled holes. These help to keep the joining sections aligned and stable. Alternately, you can use a square section of timber baton.
How do I know if I should use a 45-degree mitre cut or a butt joint for Return Plinths?
A 45-degree mitre cut offers a cleaner, more professional finish but requires precise measurements and cutting. A butt joint is easier to accomplish but may not provide as clean a look. The choice often comes down to skill level and desired aesthetic.
Conclusion
With the right approach and tools, installing a kitchen plinth is a manageable task that offers aesthetic and functional benefits. Happy fitting!
